Chocolate Donut Party Favors
This week on Bakers Party Shop blog we're teaching you how to make chocolate donut party favors. We'll show you how to make them + package them up to make the cutest take home party favors. You'll wow your guests with these mini donuts made of chocolate. I mean come on...chocolate in the shape of mini donuts with sprinkles....um, hello! So who's ready to get food crafting?!

Chocolate Donut Party Favor Supply List
silicone mini donut candy mold
large donut candy mold
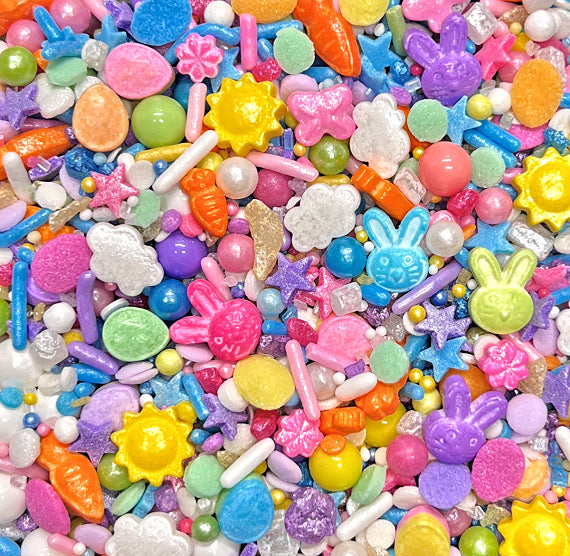
nonpareils, we used our coral reef nonpareils mix
Ghirardelli chocolate melting wafers, we used dark and white
4x6 cellophane bags
grease resistant cookie cards, 3 7/8 x 4 7/8"
donut paper punch
thin cardstock in a few colors, we used paper from Paper Source
disposable piping bags
glue stick or craft glue + stapler

Step 1:
Place your candy mold on a flat cookie sheet. Melt some dark chocolate meting wafer per package instructions. I tend to work in medium size batches and melt very slowly in the microwave. You do not want to get your chocolate too hot as it will get clumpy or can even burn. It is better to be cautious and melt it slowly. Once your chocolate is melted transfer to a disposable piping bag, twist the top closed and snip off a little of the tip. Start filling the mini donut cavities on the candy mold. Once you've almost filled as many cavities up with the amount of chocolate you've melted carefully tap the cookie sheet to help any air bubbles in the chocolate come to the surface.
Allow your chocolate to set up fully before you attempt to remove them from the mold. You can place them on a level surface in your fridge or freezer to help speed up the process.

Step 2:
Unmold your donuts and place them on a cookie drying rack if you are decorating many at a time with a drizzle. I couldn't find mine while I was working on this project so I improvised by using some wooden utensils to prop the donut on. Really, a cooling rack will make things easier for you. Meld white chocolate melting wafers (you have to be even more careful melting white chocolate so go slow).
Fill a piping bag as you did before but this time only snip of the very end of the tip so when you drizzle over the dark chocolate mini donuts you will create thin lines. Drizzle just a few at a time and quickly sprinkle on your nonpareils before the chocolate sets up.

TIP: You can make your chocolate donut party favors a week or so ahead of your party. Store in a sealed container between layers of parchment or wax paper and set in a cool place out of sunlight. If you want to make them closer to your event I would suggest giving yourself at least 2-3 days ahead of time to allow enough time for you to make and package them up.

How to Package Up Your Chocolate Donut Party Favors
Our 4x6 cellophane bags are the perfect size to fit 4 of the mini chocolate donut candies or 1 large donut candy. Placing the chocolates on a grease resistant card to hold the chocolates provides some sturdiness to the bag and also shows of your donut candies.

Use a donut paper punch and a few colors of thin cardstock to create a header card for your favor bag. Cut out 4x4" squares from your cardstock to make the header card. Fold them in half and crease the folded edge. Place the card over the top of the bag filled with your chocolate donut candies and staple down close to the top of the white grease resistant card.
Now it is time to decorate your favor bags! Use a donut paper punch and punch out a few colors of paper in colors that compliment the color you chose to make the header card out of. Thin cardstock works best with this paper punch. When you punch out the donuts, surprise you not only get a cute donut shape you also get a polka dot and little jimmie sprinkle shapes. Using a glue stick apply glue to half of the backside of one paper donut and place it on the header card where the glue is on the card and the unglued part is over the clear bag. Apply glue to the jimmie sprinkle paper pieces and add them to the header card too. If you don't have a lot of patience you can use the polka dot shapes.

There you have it! A cute chocolate donut party favor that you can make for all kinds of events and celebrations. I don't think anyone would turn down a cute decorated bag filled with mini chocolate donut candies. We hope you enjoyed our food crafting project! If you make some be sure to share and tag us on IG "#BPSsweetie @bakerspartyshop". We love to see all of the sweets you are all making.
To celebrate National Doughnut Day this year we partnered with some fabulous bloggers to bring you some fun doughnut parties, DIY's, and inspiration. Head over to our Instagram page @bakerspartyshop and look for the doughnut post for more details and follow our special hashtag #revelingwithdoughnuts to see all that we created to celebrate this "sweet" day!
Cheers,
Esther & Shauna
This post was written, styled and photographed by Esther of the Bakers Party Shop. If you share a photo from our post a link must be displayed back to this post and credit given to Bakers Party Shop. All photos in this post and content are copyright of Bakers Party Shop - The Bakers Confections, All rights reserved 2019.
PS: If you enjoyed our post please share the love, pin the below Pinterest worthy photo to save for later inspiration!

Leave a comment