DIY Hot Cocoa Mug Marshmallow Pops
We've declared January Hot Cocoa month and with that will be sharing fun posts all month long here on our blog. Yippee! Make sure to stop by our Instagram page @bakerspartyshop too for some sweet hot cocoa inspiration. We will end the month in a BIG way with a styled hot cocoa party display plus a GREAT BIG giveaway!! Make sure to stop back all month long to see some fun "hot cocoa" related posts. We have partnered with some other fabulous businesses so make sure to stop back here or on our Instagram page to get all the details. Thanks to one of our sweet hot cocoa lovin' customers Constance Wilson, our first blog post in our "hot cocoa" series is by her. She makes beautiful and fun cake pops, marshmallow pops and treats on a stick! We saw these on her Instagram page @constance.can and knew we had to ask her if she would share and teach us how to make her fun pops. We were happy when she said yes so we hope you enjoy these cuties as much as we do! Thanks Constance!

HOT COCOA MUG POPS TUTORIAL BY CONSTANCE:
I'm still in my first year of this culinary adventure and enjoying every sweet and small creation! On the flip side, I've been sipping hot cocoa since childhood. One sip today and I'm transported back to the 80's. You remember that decade -- when cellphones were a thing of the future and without their distraction families could create a pot of steamy chocolatey goodness on top of the stove to sip while watching Wheel of Fortune? Fast forward 30 years and cellphones have evolved into an appendage necessary to navigate the hustle and bustle of the daily grind. And albeit Pat and Vanna are still hosting America's favorite game, we can DVR it nowadays and just binge watch an entire month's worth in one day. Don't you miss the good old days? I do too! But we don't have to this month, not with this stroke of genius from Esther and Shauna to celebrate this legend we all know and love, HOT COCOA! (Thanks girls!) And now onto my latest creation, my pop version of our favorite cold-weather beverage disguised as marshmallow covered in chocolate and vanilla candy melts, topped with tiny marshmallows (And if you're feeling extra indulgent a final drizzle of chocolate in the name of celebration wouldn't hurt. Indulge. I won't judge.) Prepare for cuteness factor stage 10!

To begin, clean and dry your workplace and gather all the ingredients. When working with chocolate or candy melts, assembly moves as quickly as the chocolate dries so it's best to be prepared with everything setup and within arm's reach. And now a final note before we dive in. To my first-timers and novices: If you've ever thought of making cake pops but felt like it would not be successful or if you've tried it and it was an epic fail, I encourage you to give it one more try but with marshmallows instead. The beauty of cookie pops and marshmallow pops are that, unlike their more mature and sophisticated big sister the cake pop, this younger pair requires less science and allows you to get right to the art of creative expression. In the cake pop world we call it the dip and decorate stage. For my professional and seasoned poppers, you know the sky is the limit on this little project. I imagine a handful of seasonal sprinkles and a set of colorful food writers against this hard candy shell may open a new world of possibilities. So have fun. Embellish. Be brave. Let's create!

Ingredients:
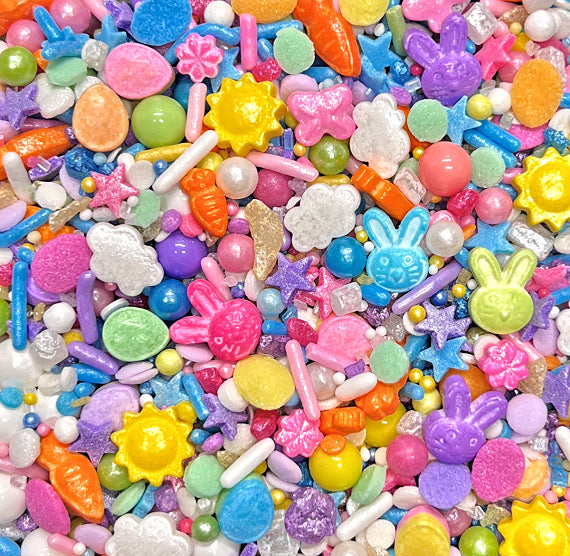
Marshmallows - regular size AND tiny that you can find HERE
Vanilla candy melts
Chocolate candy melts
Licorice laces (cut into 1 inch strips)
Toothpicks
Silpat (wax paper may be substituted)
Lollipop sticks - for the gold ones click HERE
Paper towels (for the inevitable chocolate oops and whoops)
Microwave safe bowls (clean and completely dry)
1. Line up marshmallows on Silpat or wax paper.
2. Using the microwave, melt vanilla and chocolate melts according to manufacturers instructions.
3. Dip tip of lollipop stick about 1/4 inch in melted vanilla candy melts. Shake off excess and insert in marshmallow. Let dry about 5-10 minutes.

4. Dip ends of licorice lace in melted vanilla candy melts and insert into marshmallow to create handle. Let dry about 5-10 minutes.

5. Insert marshmallow pop with handle into melted vanilla candy melts. Fully submerge and gently tap off excess. Use toothpick to pierce handle opening as the chocolate may create a bubble there. Continue gently shaking off excess and inspect for any air bubbles. Pop with toothpick and fill in with surrounding chocolate. Return to Silpat or wax paper. Let dry about 10-20 minutes.
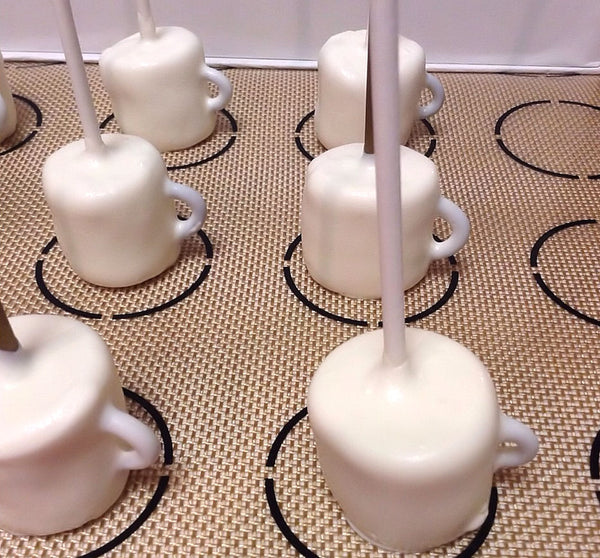
6. Dip clean toothpick in chocolate candy melts and using it as a pen, draw a circle of chocolate and fill in (for the hot cocoa). Quickly top with 3 or more miniature marshmallows. Let dry 5-10 minutes.

7. Finally, pour yourself a real cup of hot cocoa and allow your hot cocoa marshmallow pop to take a swim for a cute kiss of extra sweetness! Or if you prefer, skip the dip and dunk and just devour as you please!

Tutorial written by guest contributor Constance Wilson. She is based in the Washington DC metropolitan area and order inquiries can be sent to suitecreativity@gmail.com.
To see some of her other creations on a stick you can find her on Instagram @constance.can.
If you share a photo from our post a link must be displayed back to this post and credit given to Constance Wilson.
All photos are copyright Constance Wilson, @Constance.can, All rights reserved.
So cute! thanks for sharing!!
These are simply the cutest! Thanks for sharing!!
Sounds like a simply delicious drink on a cold winter day to soothe the Soul! Where can I order them?
Leave a comment